Does the thought of a razor sharp blade on your neck make you reach for the nearest blunt old safety razor?
Fear not! Follow the steps in this guide and you’ll be enjoying a close shave and not worrying about flashbacks from Sweeney Todd. This guide will start with the basics and go through just how to use a cut throat razor. If you are looking for more detail, read through some of our blog posts on individual shaving topics.
Before we start..
-

Traditional Straight Razor
View This RazorThe first kind is the traditional "old school" straight razor - This razor comprises of 2 elements, a handle and a blade. This kind of straight razor requires maintenance.
-

Straight Razor with Disposable Blades
View This RazorThe 2nd type of straight razor (sometimes referred to as shavette) consists of 3 parts a handle, blade holder and a disposable blade. This kind of razor requires no maintenance, however does require replacement blades when they become dull. If you have this type of razor you can skip the maintenance sections of this guide.
What Gear Do I Need?
For a straight razor newcomer it can be daunting to figure out exactly what you need - strops, brushes, razors, honing stones, soaps. It sounds like a new language!
My Story: When I first started using a straight razor I was hoping to spend as little money as I could and get the least amount of equipment as possible... and I got (razor) burnt for it. I bought a cheap razor that was blunt within a few weeks, and as I didn’t have a honing stone I couldn’t keep it sharp. But if you have the equipment you need you can avoid my mistakes. It was a disaster! So I am hoping to get you from avoiding my mistakes.
I have split this into three categories - absolutely essential equipment on day one, long term equipment that you will not need on your first shave but will need by day 50, and finally nice to have that will make your shave much easier and more luxurious.
Build your own kit with Cut Throat Club
We have launched a new cut throat razor kit builder which guides you through all the products you need to get started on your wet shaving journey. Why not give it a try!
Your Essential Equipment
-
 Shop Cut Throats
Cut Throat Razor
Obviously... of course there are a variety of types and styles you can pick from.
-
 Shop Creams
Shaving Soap/Cream
Just like with a supermarket-bought razor your new straight razor will do a better, and safer, job with a lather of shaving cream or soap on your face.
-
 View Strops
Leather Strop
Used before every use to keep the razor clean and sharp.
-
 Shop Brushes
Shaving Brush
Depending on what soap/cream you use a shaving brush is essential to build a thick lather. This helps lubricate your face and provides a barrier between your skin and the blade resulting in a closer and safer shave.
Your Long Term Requirements
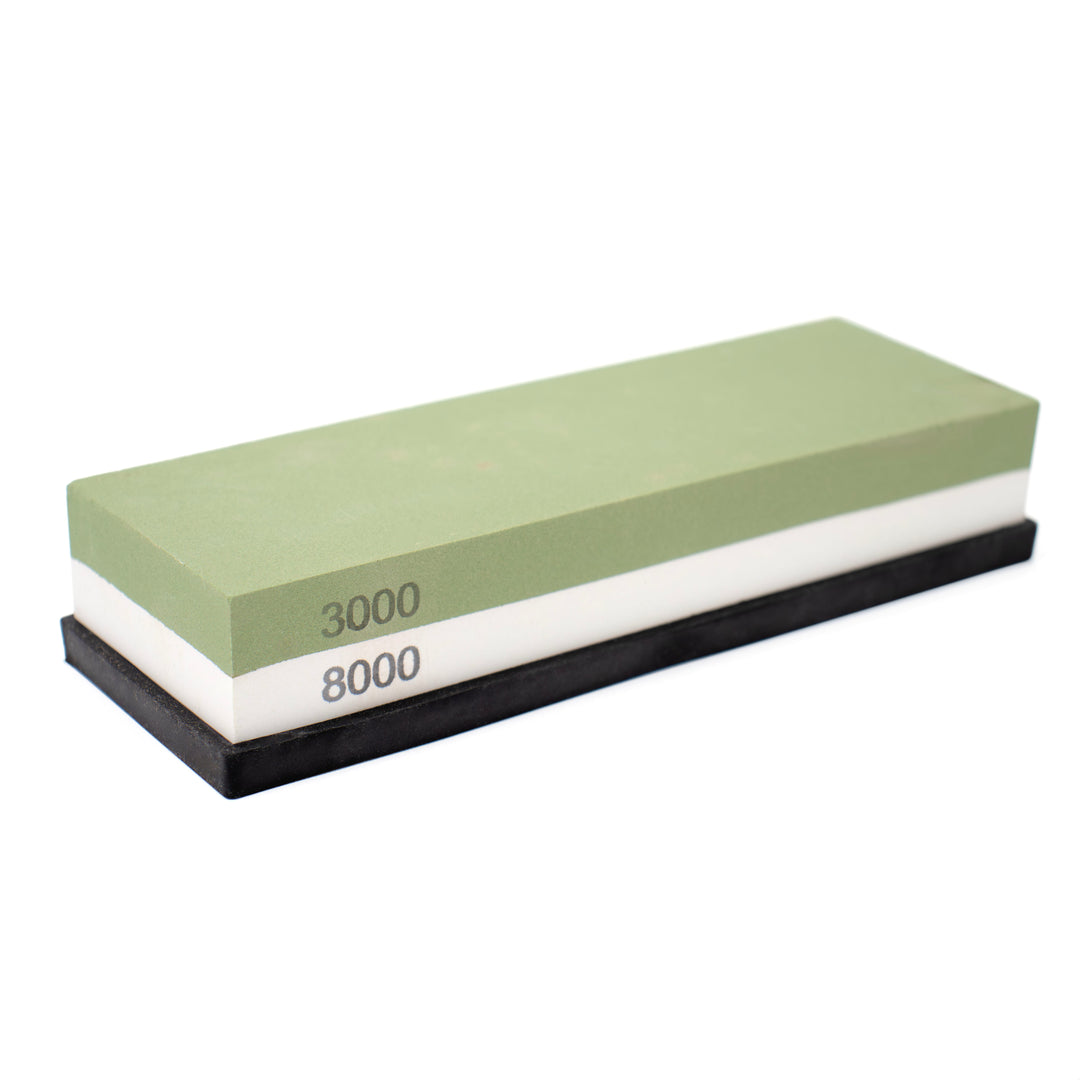
Honing Stone
Your razor will come ready to shave but stropping alone will not keep it sharp. After a period of time – depending on how often you shave – you will need to get a honing stone. Some stores offer honing services, so can be done for you , but I believe it adds to the whole experience of wet shaving.
Stropping Your Razor
If you've purchased a straight razor from Cut Throat Club, then you can skip this step for your first shave as all our razors come "Shave Ready". Be sure to strop your razor before every shave thereafter.
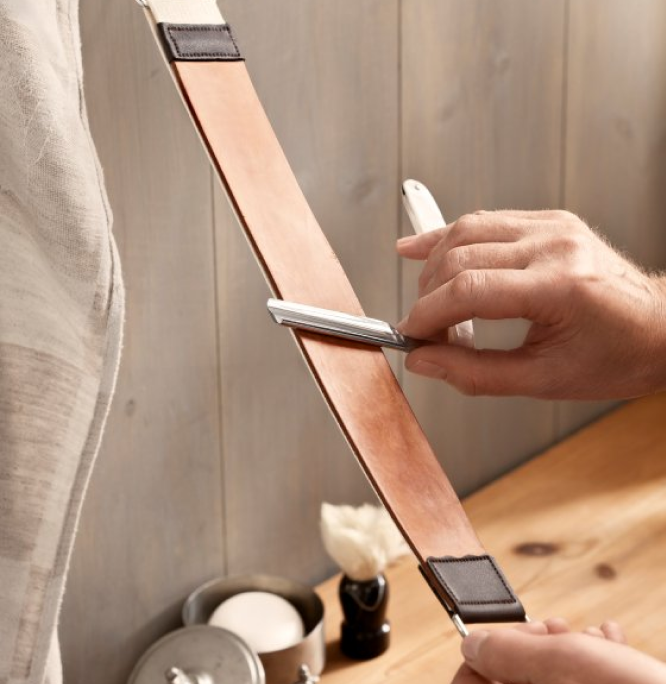
You’re out of the shower, ready to shave. But wait! Stropping your straight razor before each use is vital to getting the best possible shave. By running it along the strop it keeps the blade aligned and straight, ensuring you get the best possible shave. Your strop is made up of two components - a fabric side and a leather side. The purpose of the fabric is that it is coarser and it will remove anything that could damage the leather – things like bits of metal or just leftover soap from last time. The leather has a much smoother surface will do the majority of the work on the razor's surface to keep it straight and aligned.
Quick Tip
As you will strop each time before shaving, mastering stropping
is just as important as mastering shaving itself.
Keep your strop in good condition:
Your strop should always be clean and smooth. If you find some surface defects, clean or consider replacing it. It is a good idea to keep it in a closed box or cupboard to protect it. One end of your strop has a hook, use that securely attach it to something in your shaving room. Hold the other end of the strop in one hand and keep it under constant tension.
In your other hand hold the razor your thumb and forefinger. The main rule in stropping is to do it slowly, carefully, and gently. Concentrate on getting it right to start with, you can go faster as you master the art.
Hold the razor so the blade’s edge is on the leather at the far end of the strop. With the edge trailing, pull it towards you along the strop. By making sure the blade is trailing as you pull it, you will make sure you don’t damage the strop.
Keep your hand relaxed so your movements aren’t strained. It will help the razor glide easily on the strop.
When you reach the end of the strop, rotate the razor on the backside. This avoids blunting the edge.
Repeat 15-20 times on each side - first the fabric and then the leather. As a beginner, you will strop slower, but after some time with stropping, it will not take long.
Make sure you wipe the razor clean after each use.
You can apply a stropping paste to the leather side of your strop to keep it smooth and supple and keep it going for longer.
Prepare your face
Before you shave there are a couple of steps to make the process quicker and simpler.
Jump in the Shower
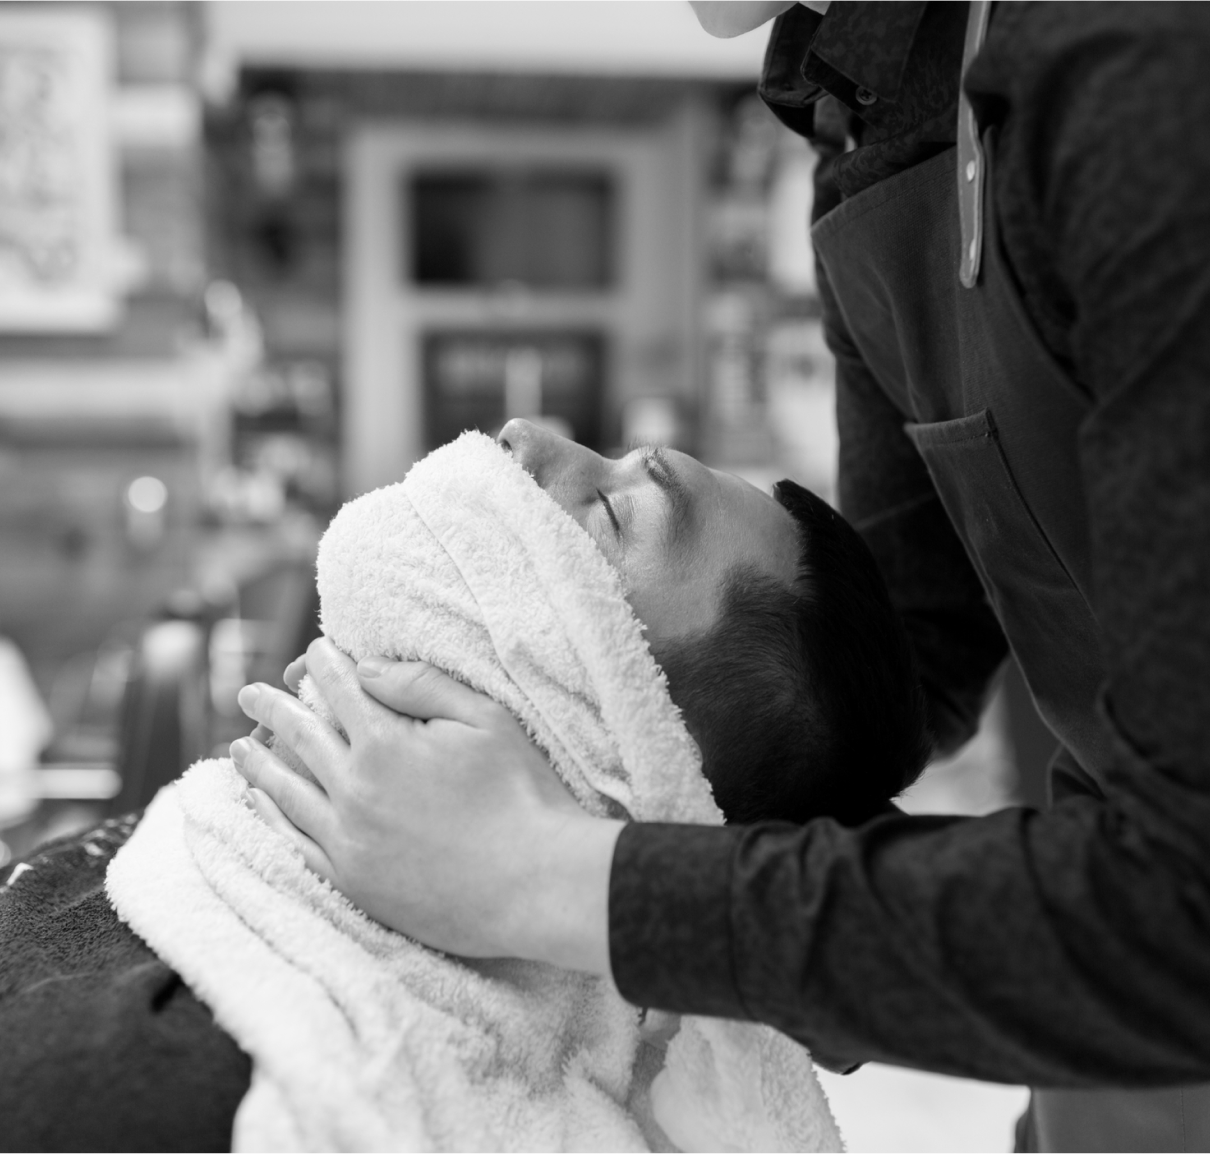
Taking a hot shower before shaving is the easiest preparation. Wash your beard with soap or shampoo to remove the natural oils and don’t dry your face after the shower.
Splash hot water on your face.
If you’d prefer to take a shower after shaving, you can splash hot water onto your face instead.
Hold a hot towel.
Soak the towel in a hot water and hold it onto your face.
Apply Lather
Soak your brush in hot water. Use a small amount of shaving cream or soap and mix it with the brush into a lather using either a shaving bowl or using the soap contain itself (check out our guide on creating a good lather). Completely cover the area you want to shave with lather using a swirling motion. Leave lather on your face for a short amount of time before shaving.
How To Use A Straight Razor?
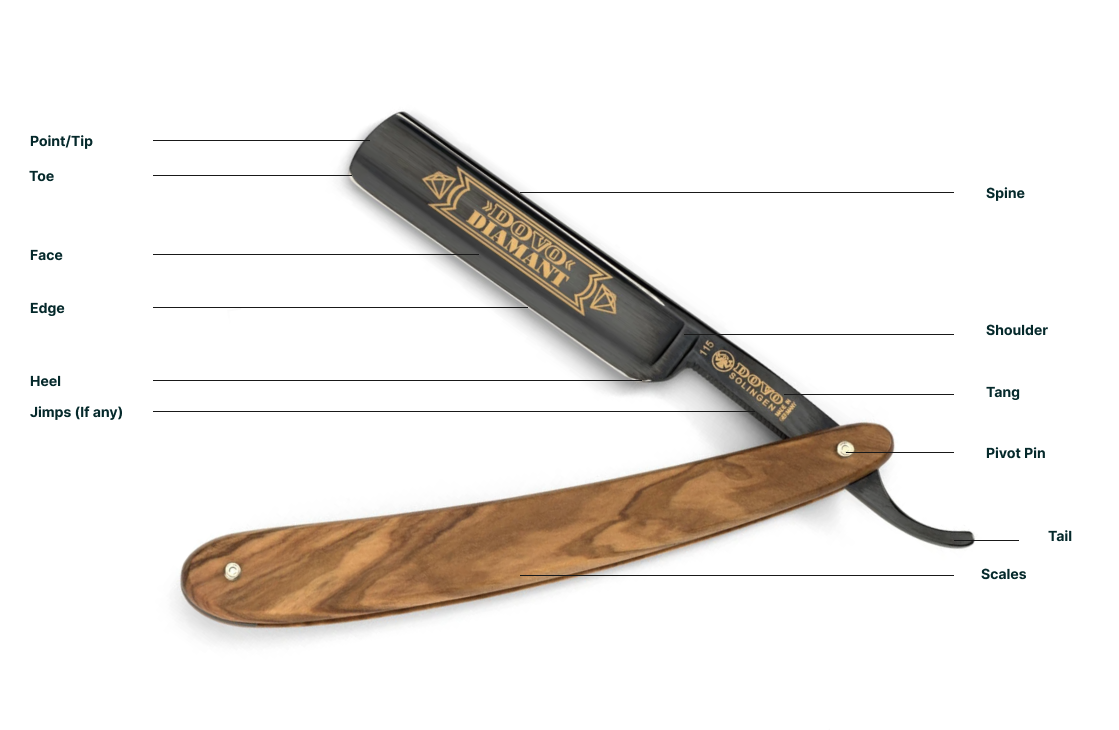
Now we are getting into the good stuff! One of the most important things to get right is how to hold the razor. It sounds straight forward but it can be tricky to figure out. The first thing to understand is what the individual parts of a straight razor are called.
How to hold a straight razor?
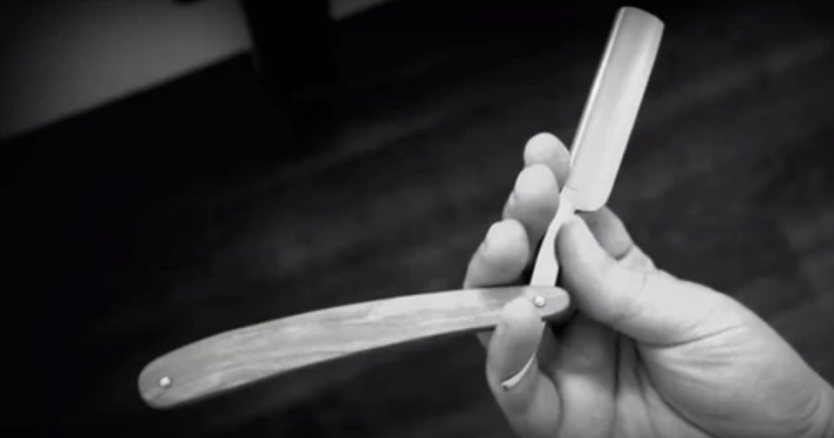
Pick up your razor with your first finger on the shoulder of the razor and your thumb just outside the heel. Follow this so that your first three fingers rest on the tang. Keep the handle pointed up and place your little finger between the tail and the handle as in this photo.
Holding your razor like this will let you get the closest shave while maintaining safe and secure control over it.
Shaving with a Straight Razor
Everyone has their own tricks and tips on how to deal with a straight razor, and soon enough you will also have your own way. But here are the main steps on how to get the closest shave.
Quick Tip
Hold the razor at a 30 degree angle from your face. Run it along your face in the direction of
your beard’s growth, taking slow strokes and applying little pressure.
Let the razor’s sharpness and weight do the cutting.
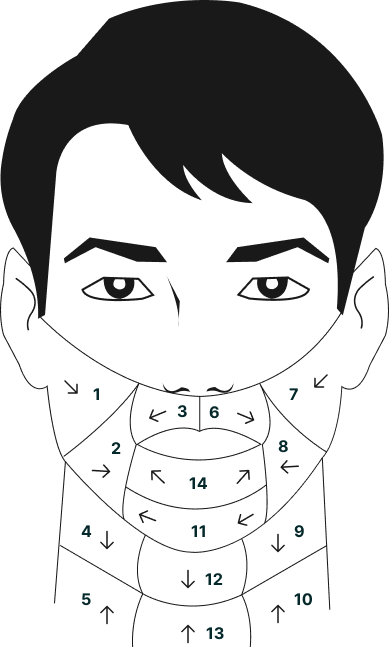
The 14 Stroke Shave
The illustration below gives an example of the order and direction of each stroke to shave your face in 14 strokes.

The Cheeks
Before we start lets get yourself in front of a mirror so we can see what we're doing. Starting on the right hand side of your face, softly pull the skin upward with your non-shaving hand to make a smooth shaving surface. Shave downward across half of your cheek. Move your fingers down, pull the skin upward and continue shaving. After your cheek is completed, tilt your head left and back to expose the skin under the right jaw. Keep the skin tight by softly pulling with your fingers and continue shaving based on your beard’s growing direction. Repeat on the left hand side of your face.
Upper lip
Stretch your upper lip downward and shave in the same direction.

Chin & Under the Chin
Stretch your lower lip upward and shave the chin. Tilt your head back and elevate the chin, while drawing the skin down and shave.
Multiple passes
For those new to straight razor shaving one pass should be sufficient. But if you want the closest possible shave then you can do multiple passes.. Remember to wash your face and apply lather for any repeat passes. First, shave with the grain, then across, and finally against the grain.
There are a few different techniques that can be used to get that baby-bum smooth face. The most common is the 'three pass shave' technique.
This is the most common way to shave and is best place to start with straight razors too. Shaving with the grain removes the most hair in the easiest way. In easy to understand terms it means running the razor in the same direction as the hair is growing.
For some people directly from with the grain to against the grain can be irritating or painful, so shaving across the grain is a great in-between step. Shaving across the grain goes from the side of your cheek towards your mouth and nose.
The final pass in this technique goes against the grain - the exact opposite direction to going with the grain. It gives you the smoothest shave due to the change in razor angle compared to the angle of the remaining stubble.
Everyone's skin and facial hair are different. Some people find that a three-pass shave gives too much irritation so opt for just one pass.To work out your answer for “how to shave” you need to know how much your skin can take, and how close of a shave you ideally want. Like all shaving techniques, practice makes perfect - do not expect perfection in your first go.
After Shave
When you’ve finished shaving, rinse your face off with cold water. Then apply any aftershave cream or gel that you usually use. And that is all! Now you the steps to use your new straight razor, but remember it takes time to master a new talent. With patience and experience you’ll be getting the best shaves of your life in no time.
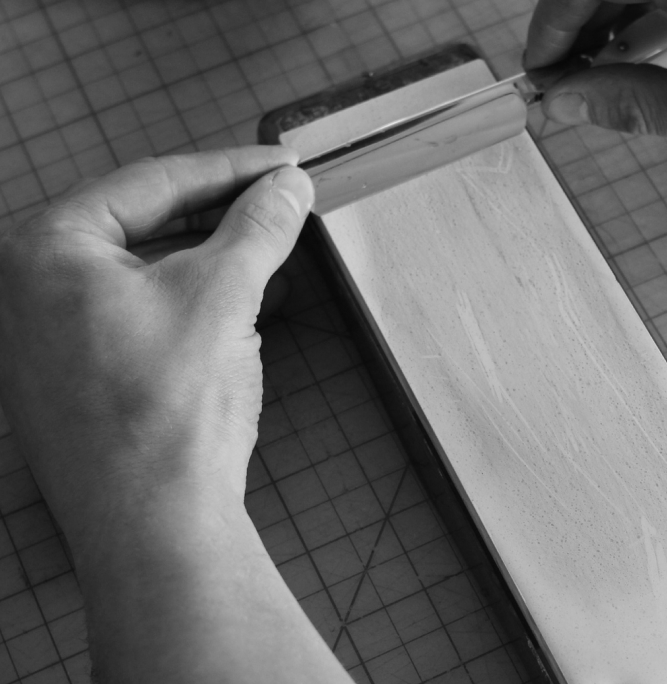
Honing Your Straight Razor
Unlike a cheap supermarket razor that needs new blades every week your straight razor is built to last a lifetime. You just need to give it some attention to make sure it stays, ahem, razor sharp. Using your leather strop will help keep the edge aligned, but it won’t sharpen the blade. To do that you’ll need a honing stone.
Honing stones come in various different grades, which is called grit. These can range anywhere from #500 grit to #12,000 grit, the higher the number to finer the stone. To take a completely blunt razor from dull to sharp you would begin on a low numbered honing stone and work up.
For a straight razor, we would recommend a #4000 and #8000 grit honing stone to bring a normal razor back up shave ready. An extremely blunt razor may need a coarser stone, to begin with.
Practice is required to become a razor honing master, so take things slow and let the stone do the work.
Wet the stone and make sure the surface is clean. Any imperfections in the stone will result in imperfections in the razor.
Place the razor on the top of the stone facing towards you.
Pull the razor back towards you on a slight angle to ensure the entire length of the blade is drawn across the stone. Keep the razor's edge flat and do not apply any additional pressure - let the weight of the razor and the grit of the stone do the work.
At the end of each stroke turn the razor around making sure that the edge is not drawn across the stone which can blunt the edge you have just formed.
Follow the X pattern shown in the graphic below.
Repeat depending on how blunt the razor is - you will get a feel for this over time.
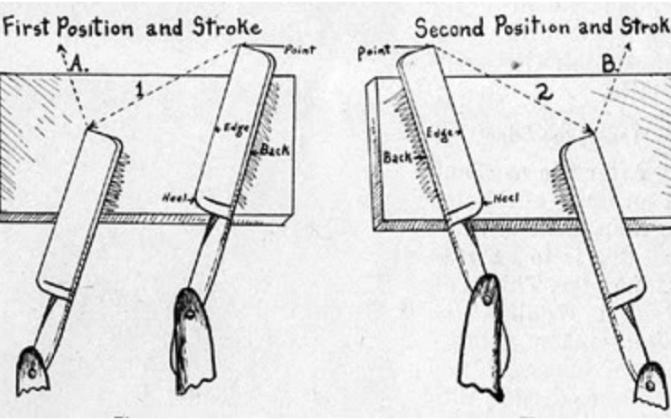
Position & Strokes
view honing stones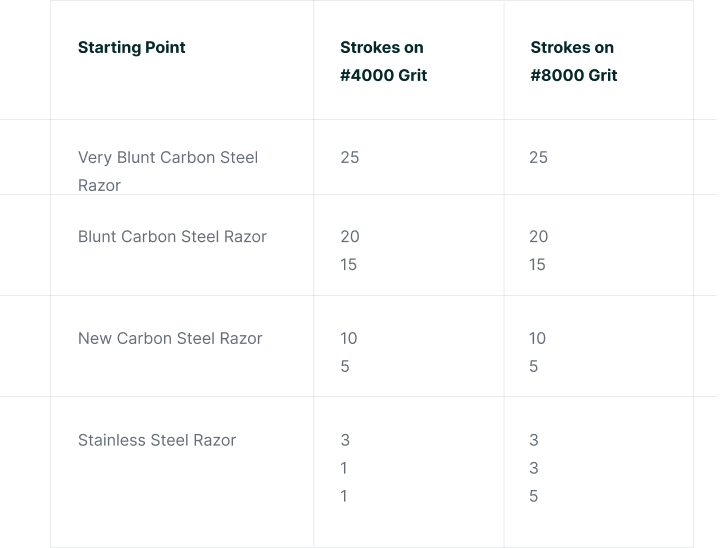
The Pyramid Honing Technique
The Pyramid Honing technique is a method of alternating between two different grit honing stones. The beauty of the pyramid is that you can start at different points depending on the razor and just work all the way down.
A few explanations of how to follow the pyramid:
- One stroke includes running both sides of the blade's edge on the stone.
- The fewer strokes the better.
- Choose your starting point based on razor steel and how blunt it is. For example a stainless steel razor takes fewer strokes but they need to be honed more often.
- Work your way down the pyramid.
Some helpful additions
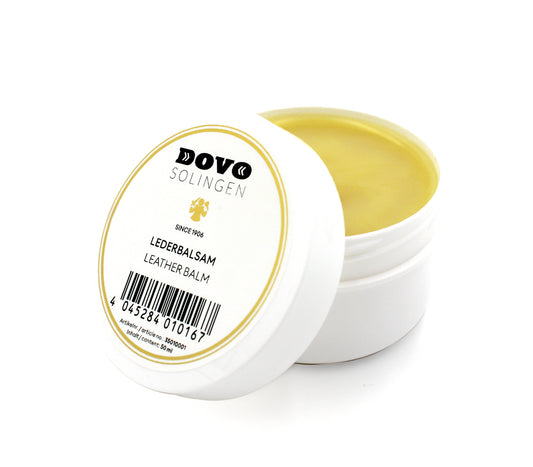
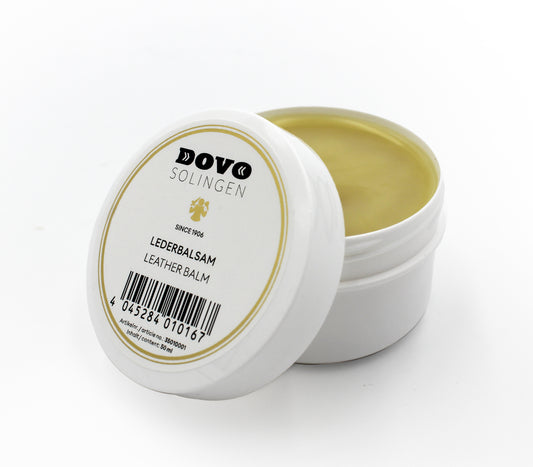
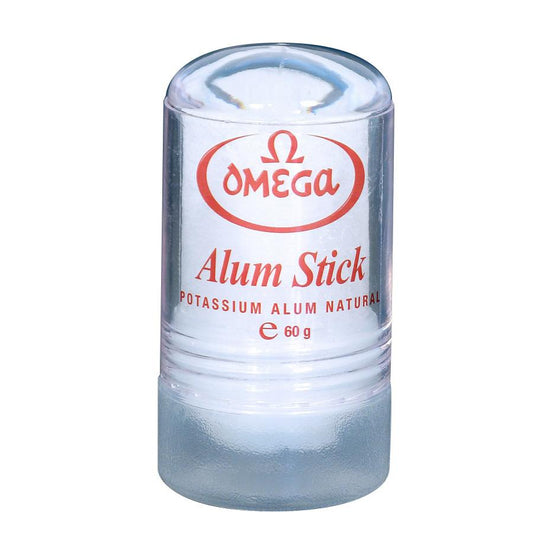
Once you've got the essentials sorted there are some accessories which will make your life easier and give your shaving amroury an upgrade. See below some of our recommended products.




Conclusion - Phew!
That is everything. All in one place. If you are interested in getting started wet shaving then check out the Cut Throat Club's product range.
We would love to get your input on any differences of opinion you have or other lessons you have learned that new beginners would value - Please leave a comment below.
18 comments
Hi one thing really i am wondering what the mineral stick is for that is part of my new shaving kit
I have z 8000 grit stone..what other stone would I need.Plus i need strop…
A professional sharpener has told me the honing must be done first on a machine grinder with two grinders stones ( 1000 and 4000) and after finished on the stones!
The stones alone are just for mantening the sharpening until it will lose all is sharpening and must go again to the machine grinder! Can you confirm this? Thanks Hope you will make a deep research before answering indicating also the origin of your information. Best regards
I bought a twelve dollar straight razor from a truck stop just thinking I’ll give it a shot. Ive never had a more comfortable and smooth shave in my life. My face would always end up razor burnt with even the most expensive of disposable razors.
Thank you for all the sharpining tips